

In this post we’re going to go over how to setup your vlogging equipment as it will be the basis for creating videosongs, talking head videos etc. Getting this right the first time will make shooting easier later down the line.
If you know about video equipment, setups and staging please bare with me, there are others that don’t and I want to cover all basis.
This post was created more so with the DSLR camera in mind, there will be a more detailed version for smartphone users posted in the near future.
Staging: Find A Good Place To Shoot Your Video
Pick an area you feel comfortable in. Avoid plain backgrounds, they are boring and any flaw your video has will stick out like a sore thumb. A few places I would suggest are your budget recording studio, the living room, kitchen or family area. Spaces with simple (not plain) backgrounds work well to.
Here’s a good example
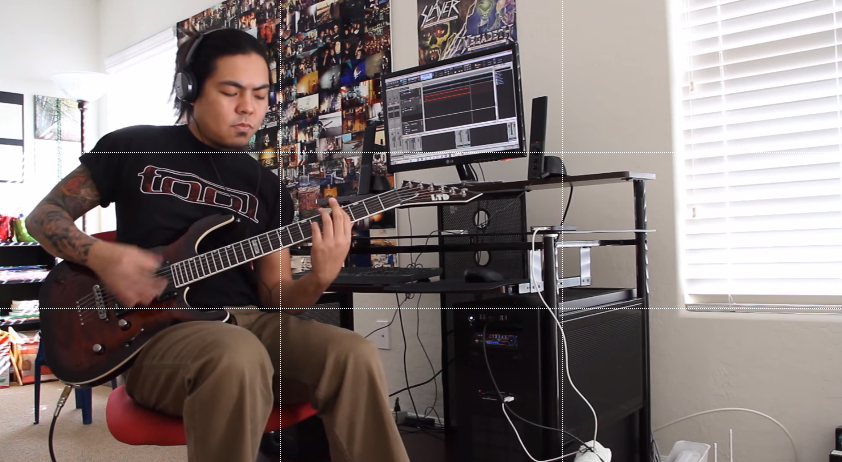
You can shoot wherever you like, those are just my suggestions.
Make sure there is nothing in the background that shouldn’t be there. A good practice is viewing your stage through the lens of your camera. How it looks through the camera is how your audience will see it as well.
If you don’t care how your environment looks, that’s fine to. Some people will give you crap for having a messy room or living condition, others will accept you for you → those are the people you want to focus on.
People cling on and relate to familiarity – something to think about.
How To Position Your Video Lights
After you find a good recording location, shed some light on it. Things tend to look a little different once lit, so experiment a little. The most common lighting setups are the 2 point and 3 point lighting.
2 Point Lighting: This is what I use for my videos. One light is the key light, which emits the most light, and the 2nd is the fill light and is used to smoothen out any shadows created by your key light.
3 Point Lighting: involves 3 lights → key/fill light and one to separate you from the background called a backlight. The backlight is positioned on your hairline (top of your head) or the background of your recording area. It also adds a little dimension to the video.
Here are examples of both


These are typical lighting positions, sometimes depending on the room, you can bounce the light off the ceiling and walls and it will work just fine. This is why it’s important to test otherwise you won’t know what works best for you.
If you need lighting kit solutions, head over to vlogging equipment.
Your Audio Setup: Where To Place Your Mic(s)
You can skip this section if you know about mics and how to set them up. If you don’t have a clue, don’t sweat it, I’ll give you a basic rundown.
Studio mics: go in front and pointed toward you or the audio source. In a video setting it’s ok to have these in frame.

Lapel mics: are clipped onto the talent, yes…. you! You can choose to hide or leave them in plain sight. I like to clip mine on my shirt similar how it’s done in this picture.

Shotgun mics: Generally kept out the camera’s frame and you want to position it directly at your both or chest depending on what sound you want to capture. Aiming at the chest will pick up more body in the sound.
Shoot Some Test Video Footage
I’m going to assume you under your camera’s basic functions. You must have in order to get through the staging section correct?
- Power
- Video mode
- Iso
- Aperture
- Auto/manual
Make sure you understand these, makes life easier
Now what you want to do is some test video footage. Although you have your lighting setup, you still need to test how you look in the light. This can be a little tedious depending on your camera, skin complexion and what you’re wearing.
Example – My glasses get in the way a lot (light reflections) rather than adjusting my light, I just remove the glasses (now) otherwise I run into casting harder shadows in my room.
I wanted to point that out because it’s crucial, and best to get it under control early on. Sounds like a lot of work right? I promise the process sounds worse than it actually is.
Next sit down, hit record and adjust to find the best look. This will be easy if your dslr has a flip out screen and you have a remote control. The flip screen will allow you to see how you look (positioning), and the remote will allow you to focus and toggle record. See the remote in my hand?

If you don’t have these, use a prop (extra personal, stuffed animal whatever) focus on it, hit record, and then sit in the props place. Rinse and repeat until you get the look you want.
It would also be wise to test your audio configuration along with your video. Remember, onboard audio is a no no. So, turn on your recorder/microphone, and keep it live so you can hear how you sound.
It’s important to get mic positioning and gain staging correct early as well. This way you know what conflicts and how to approach it in the future.
For me, recording at night is best. Everyone is sleeping, outside noise is reduced, the dog is generally calm. My project studio is the best location as it blocks most noise and my mics of choice are the H1 Zoom and a shotgun.
If I’m recording outside (by myself) the lapel mic is my best option. These are all things you’ll have to figure out as well. This way you can get the most out of your time and gear.
If you like this post, please let me know by sharing it.
This was an amazing post I’m just getting into posting videos and this was is truly helpful just like all your other posts thank you for the knowledge
Awesome, what video setup are you currently working with?
Love it. Thanks for all the help!!
Hi Sarah,
glad you liked it!!
Good read Greg. Thanks.
No problem KJ
Like Your Style. You K.I.S.S. (keep it simple stupid) Thanks for the Help.
Thanks a lot. Have you jumped into video marketing yet?
I like shooting in front of a green screen.
I’ve always wanted to do that. Too lazy to learn.